Create a blog with Next.js 14 + MDX + Tailwind
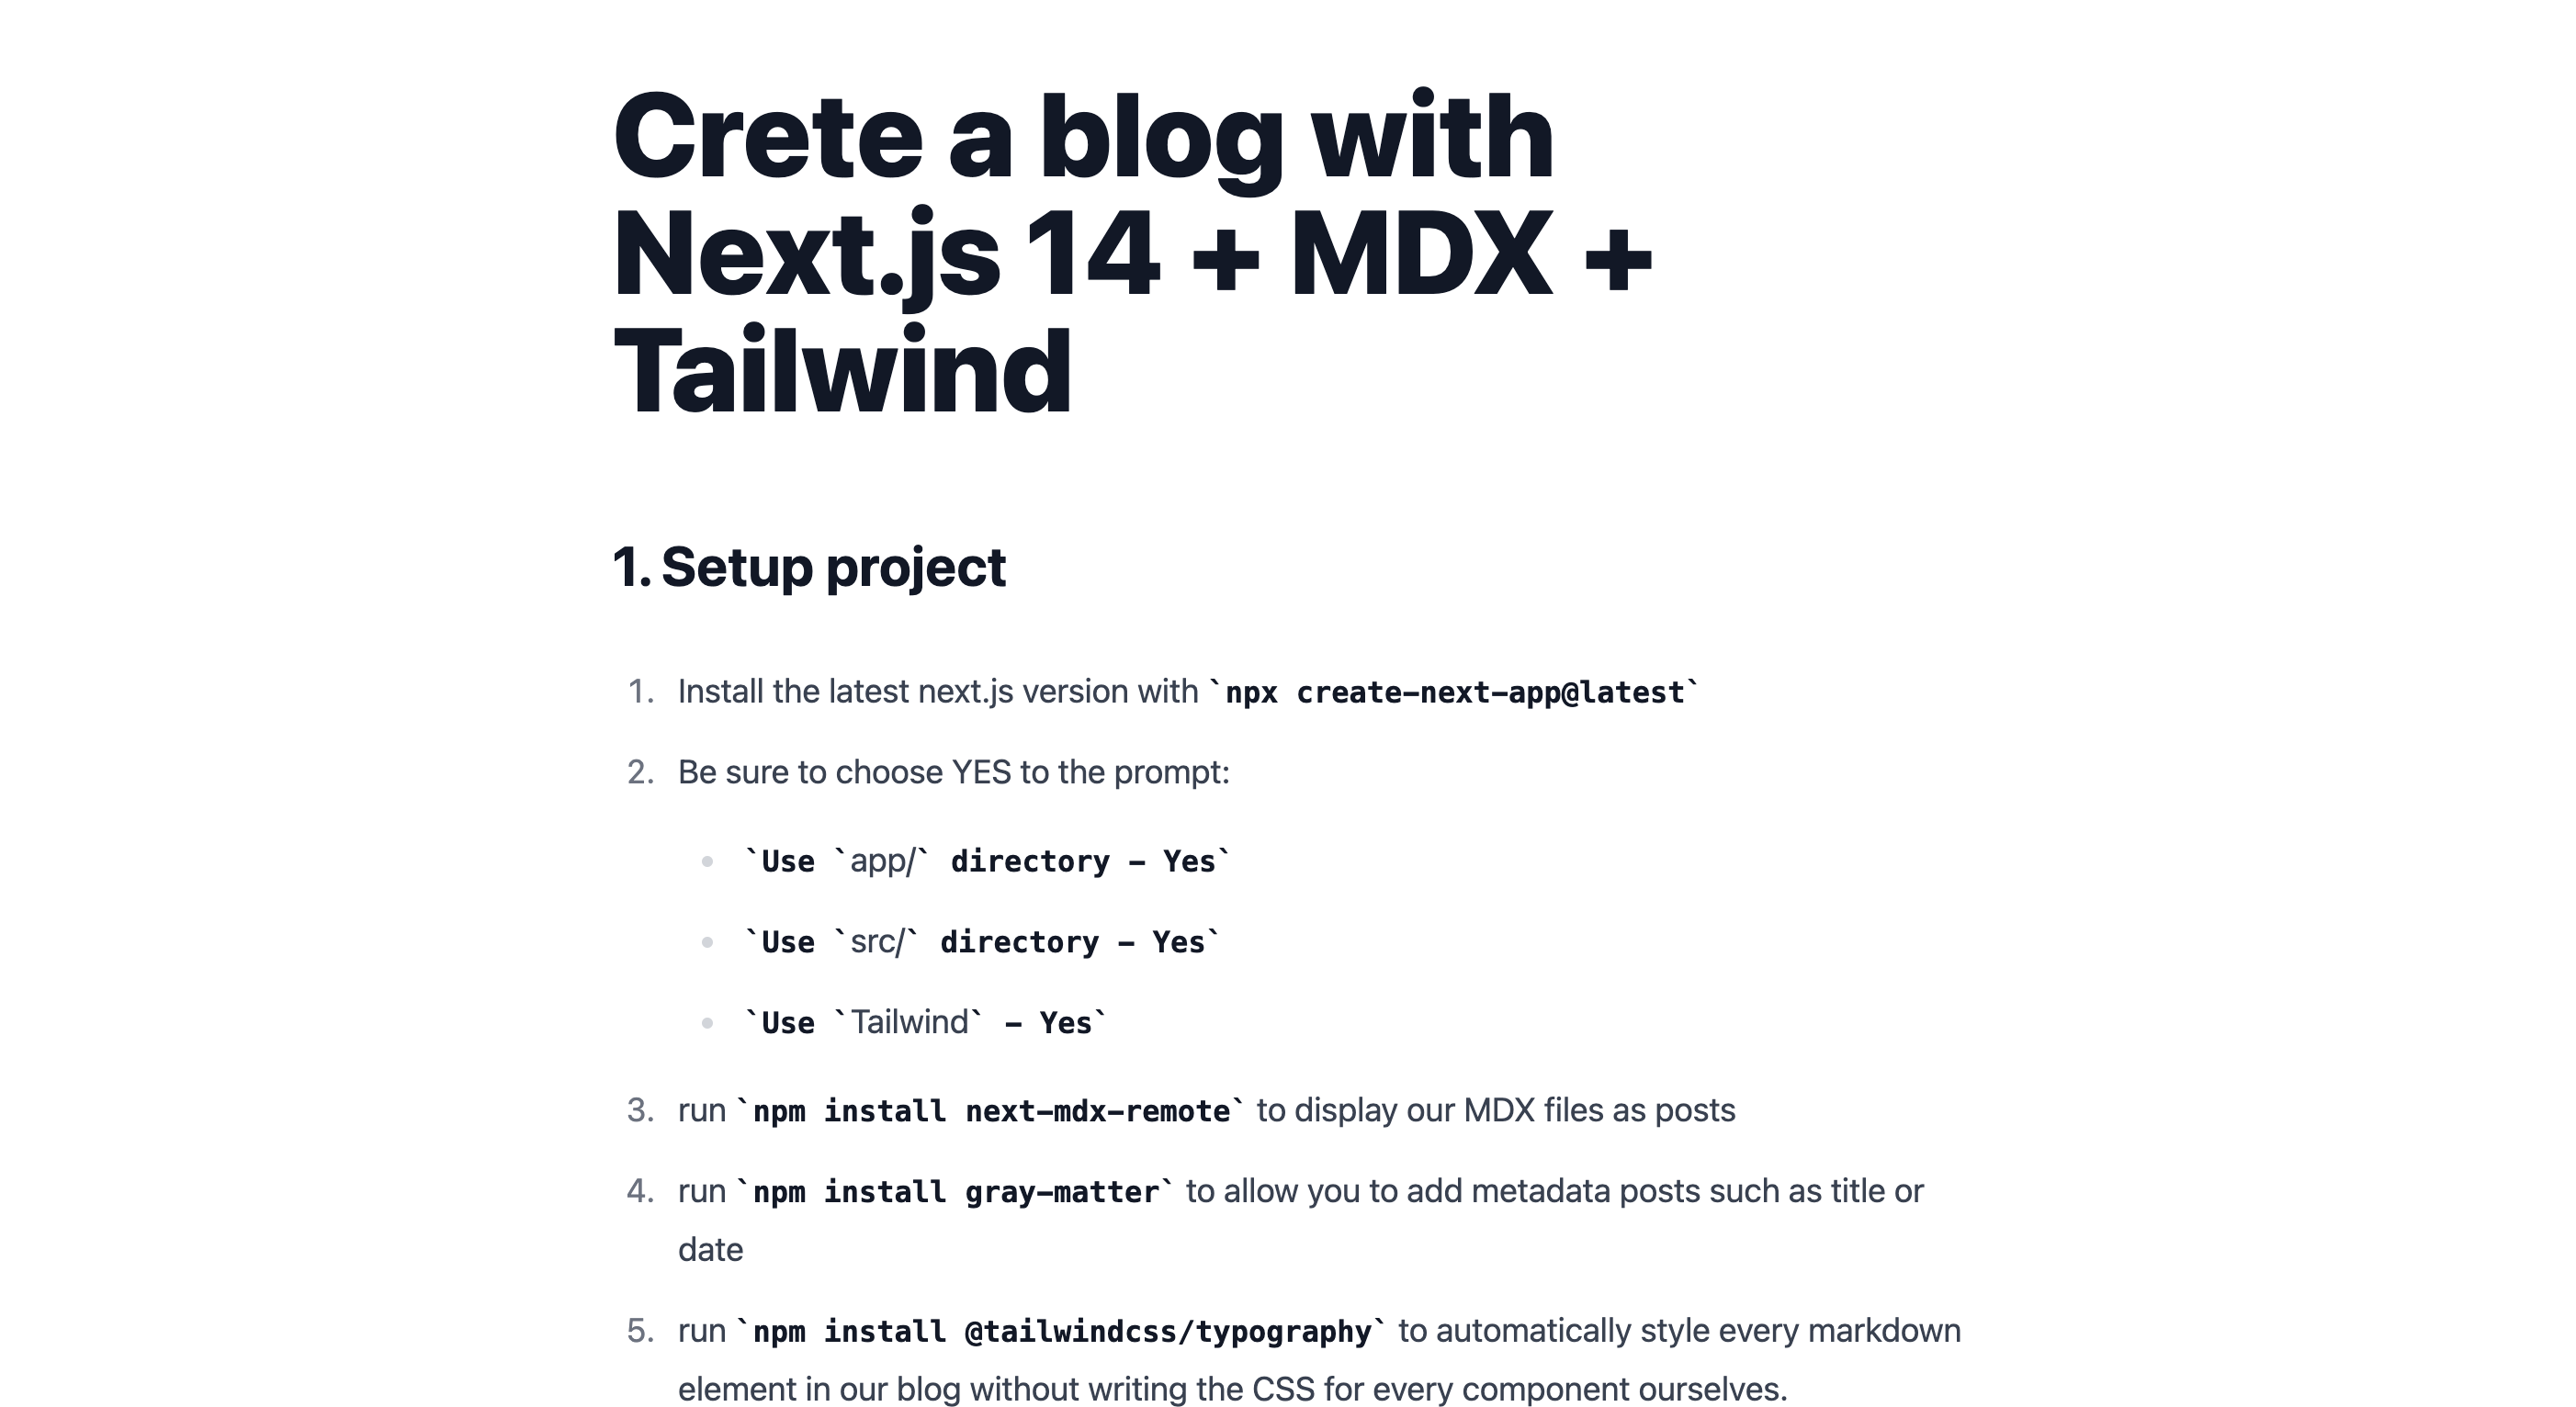
1. Setup project
- Install the latest next.js version with
npx create-next-app@latest - Be sure to choose YES to the prompt:
Use app/ directory - YesUse src/ directory - YesUse Tailwind - Yes
- run
npm install next-mdx-remoteto display our MDX files as posts - run
npm install gray-matterto allow you to add metadata posts such as title or date - run
npm install @tailwindcss/typographyto automatically style every markdown element in our blog without writing the CSS for every component ourselves.
Add TailwindCSS Plugin
In the tailwind.config.js file, we now need to add the typography plugin to our current TailwindCSS setup:
// tailwind.config.js
module.exports = {
  ...
  plugins: [
    require('@tailwindcss/typography')
  ],
}
Clean the layout.tsx
In our root layer (/app/layout.tsx) update the html tag to include the following styling.
// app/layout.tsx
return (
  <html lang="en" className="max-w-3xl mx-auto py-20 px-4 ">
    <body>{children}</body>
  </html>
);
2. Create the first post
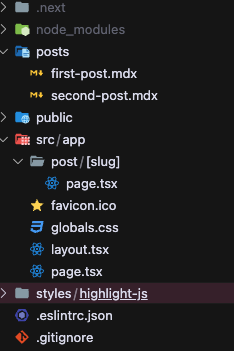
Create Blogs Directory
Create a new directory in the root of our project called posts, this is where all our .mdx blogs will be stored.
first-post.mdx
Create a file called first-post.mdx and enter the following:
---
title: My First Post
date: "15 December 2023"
description: The first post is awesome.
---
This is my **first** blog post using _MDX_.
### My h3
Here is an image:

Test the snippet code:
```javascript
export function myComponent() {
return <p>first</p>;
}
The top section of this file with the title, date and description is for Frontmatter and allow you to include metadata for your post and the application can read and utilize using the gray-matter package.
Blog Images
Put the images for your blog in a public sub-folder (/public/postImages for example) of your project and read it with 
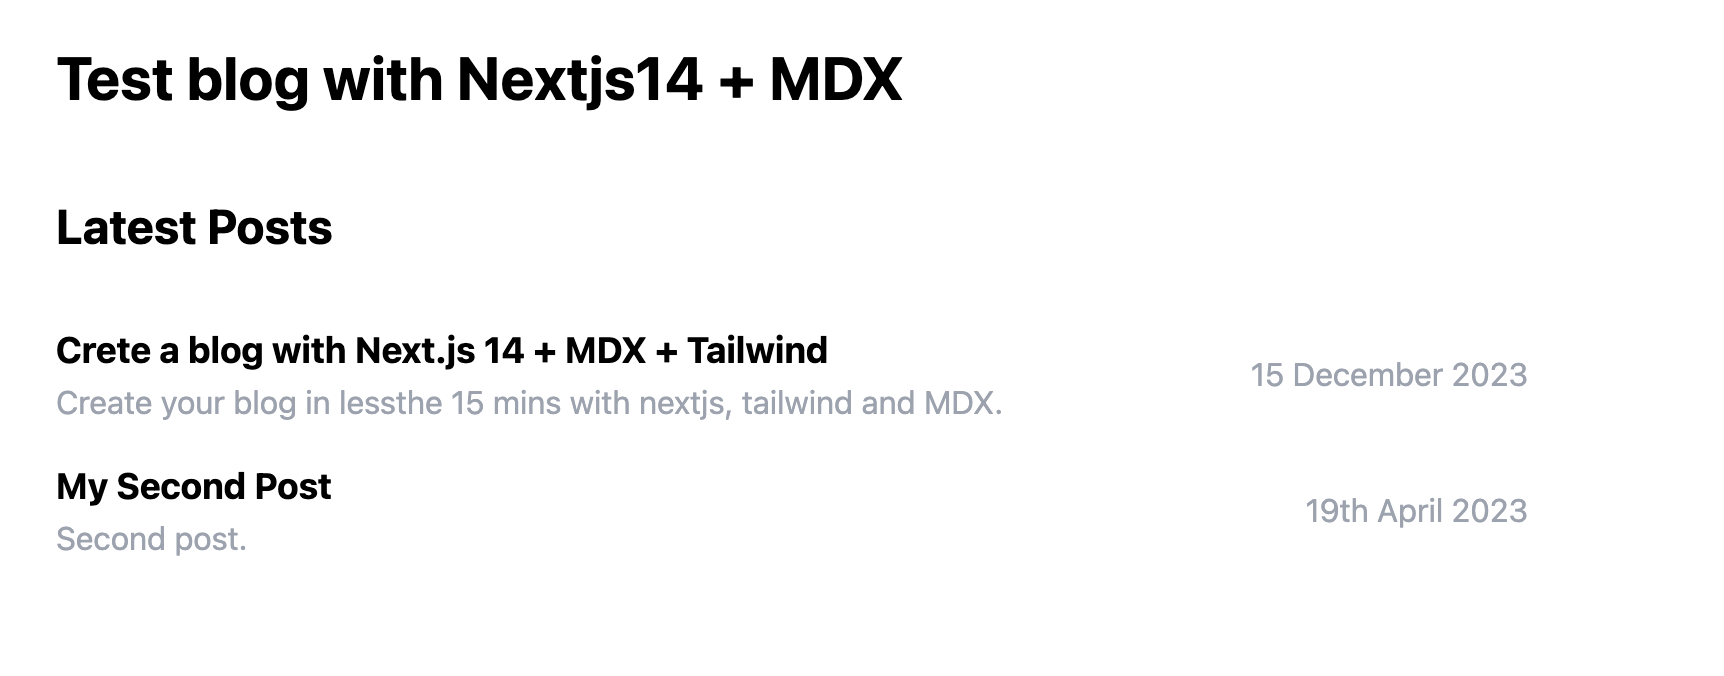
3. Create the homepage
The homepage will display the title & description of each blog post with a link to the full post.
Required Imports
// app/page.tsx
import fs from "fs"; //read our blogs from the file system
import path from "path"; //find the local path to your posts
import matter from "gray-matter"; //extract the metadata from your posts
import Link from "next/link"; //internal app link
Read .mdx Files
Now we need to read the files themselves. We will return the metadata that we setup at the start of our blog (title, description and date) as well as the page's slug.
The slug will make up part of the URL to the blog: /blogs/[slug]
For each blog our slug will simply be the name of the file (without .mdx on the end)
// app/page.tsx
export default function Home() {

	// Set posts directory
	const postDir = "posts";

	// Find all files in the posts directory
	const files = fs.readdirSync(path.join(postDir));

	// loop through posts
	const posts = files.map((filename) => {

	// Read the content of the post
	const fileContent = fs.readFileSync(path.join(postDir, filename), "utf-8");

	// Extract the metadata from the blog's content
	const { data: frontMatter } = matter(fileContent);

	// Return the metadata and page slug
	return {
		meta: frontMatter,
		slug: filename.replace(".mdx", ""),
	};
});
Display Post Previews
In the same page return this code to dislay the posts preview.
// app/page.tsx
	return (
		<main className="flex flex-col">
			<h1 className="text-3xl font-bold">Blog section</h1>
			<section className="py-10">
				<h2 className="text-2xl font-bold">Posts list</h2>
				<div className="py-2">
				{posts.map((post) => (
					<Link href={"/post/" + post.slug} passHref key={post.slug}>
						<div className="py-2 flex justify-between align-middle gap-2">
							<div>
								<h3 className="text-lg font-bold">{post.meta.title}</h3>
								<p className="text-gray-400">{post.meta.description}</p>
							</div>
							<div className="my-auto text-gray-400">
								<p>{post.meta.date}</p>
							</div>
						</div>

					</Link>
				))}
				</div>
			</section>
		</main>
	);
}
Now if you run npm run dev you can see your posts list.
4. Create the post page
The blog page will display the content of the blog itself, to do this it will use MdxRemote to render the .mdx file into html. It will then use TailwindCSS's Typography Plugin to automatically style our markdown.
Create the /app/post/[slug] directory and then create the page.tsx file inside.
The [slug] in the directory makes this a dynamic route.
Add the imports to the post page. These are the same imports as the home page other than the MDXRemote which will be used to render the post.
// app/post/[slug]/page.tsx
import fs from "fs";
import path from "path";
import matter from "gray-matter";

import { MDXRemote } from "next-mdx-remote/rsc";
Generate Static Params
By default, dynamic routes are generated on-demand at request time which leads to slow loading pages with bad SEO. Instead, as our blogs aren't going to regularly change, we can statically generate the routes for these posts at build time.
To do this, you fetch all files in the "posts" directory and return an array of slugs for each file.
// app/post/[slug]/page.tsx
export async function generateStaticParams() {
  const files = fs.readdirSync(path.join("posts"));

  const paths = files.map((filename) => ({
    slug: filename.replace(".mdx", ""),
  }));

  return paths;
}
Get Post Method
This method will simply fetch a blog post from a given slug. To do this it reads the file in the posts directory with the same filename as the slug. It then uses matter to fetch the metadata and markdown content of this file and returns the FrontMatter metadata, inputted slug and markdown content.
// app/post/[slug]/page.tsx
function getPost({ slug }: { slug: string }) {
  const markdownFile = fs.readFileSync(
    path.join("posts", slug + ".mdx"),
    "utf-8"
  );

  const { data: frontMatter, content } = matter(markdownFile);

  return {
    frontMatter,
    slug,
    content,
  };
}
Display Blog Post
Display the blog post itself. We first fetch the post with the getPost method and then display it using the MDXRemote component.
// app/post/[slug]/page.tsx
export default function Post({ params }: any) {
  const props = getPost(params);

  return (
    <article className="prose prose-sm md:prose-base lg:prose-lg mx-auto">
      <h1>{props.frontMatter.title}</h1>

      {/* @ts-expect-error Server Component*/}
      <MDXRemote source={props.content} />
    </article>
  );
}
In the code extract above we are using prose from TailwindCSS to display the markdown in a pretty format without having to style it ourselves. We are also using different prose colours (prose-slate, prose-invert) and sizes (prose-sm, prose-lg) which makes the blog page mobile responsive too.
5. Setup Blog Metadata
Setting up Metadata for your Next.js blog will really help in ranking your site on Google. The main 2 metadata tags to setup are title and description however there are many more that you may want to setup.
To generate metadata for your blog, you can use the generateMetadata method.
// app/post/[slug]/page.tsx
export async function generateMetadata({ params }: any) {
  const blog = getPost(params);

  return {
    title: blog.frontMatter.title,
    description: blog.frontMatter.description,
  };
}
Here we are simply setting the "title" and "description" metadata tags to that of of blog. We can easily expand this to set OpenGraph tags too.